How to set up PPC Campaign :


Purchase of sponsored links on the pages of the search engines that display results. Many people think that it is a stop-gap measure that is used in the intervening time before a sustained SEO campaign take effect. However, if used effectively and systematically, Pay per Click can be used for a long period of time and in conjunction with all kinds of internet marketing campaigns.
Some Step To PPC Campaign Setup
Account Structure Determination :
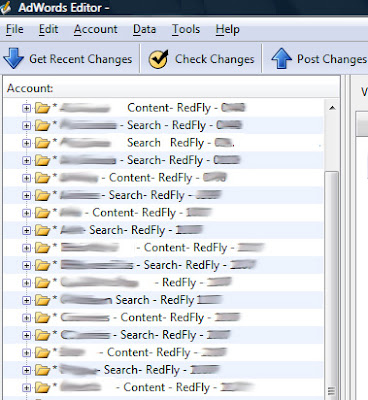
The first step is to understand how your account will be structured. It is usually best to consider the product or service that you are offering at it's most granular level and create your account like a tree. So if you have a site selling a software product or products, you should create a new campaign for each feature. For example, if you are selling some sort of image editing software, you should have a different campaign for "image editing" and a different campaign for "photo editing" and so and so forth. Inside each of your campaigns you should have generic ad groups (like a "cheap image editing software" group and a "buy image editing software" group) as well as an ad group for all the features relating to the root keyword (image editing). This may seem blindingly obvious but you'd be surprised how many advertisers just lump everything into a "software" adgroup with the default "campaign #1″ name. The tree should branch out immediately, more like a bush. So keeping image editing as an example, a single campaign will look like the attached image. Note, there are actually a few in this example.

Keyword Research :
The second step is keyword research. There have been a million posts on a million blogs about this topic, so I won't go into it. Let's just assume that you have generated a nice keyword list for each of your ad groups using your favourite keyword research tool. Wordtracker, SEO book's KW tool, Keyword Discovery and HitWise are all great tools. Each has individual pros and cons but for now, compile your list an move on. We will expand on this later on in the campaign setup but for now, we should have as big a keyword list as possible with all the keywords and phrases not related to your business taken out and put in a separate "negative" list/file. We will also use this at a later stage in the setup.

Set Up Campaign :
The third step in setting up your PPC account is creating a new search network only campaign. I wont go through the steps to create a new keyword targeted campaign but please look out for the options that are not set by default. The first setting you need to change is the network settings by removing the check from the "Content Network" checkbox. The content network can be very valuable so I do not recommend ignoring the content network completely. We will set up a new content network only campaign later or in another account. You also need to make sure that your ad serving option is set to "rotate" so you can split test your ads and your delivery method is set to "accelerated". The last option may not apply to you if you are working with a very small budget, but in general, you want to max out your budget initially if you can afford it to get some numbers to work with.

Build A Negative Keyword List :
The fourth step is creating a new keyword list. A list of terms you do not want your ads triggered for. Google has recently removed/hidden it's negative keyword builder so have a read of our negative keyword tips. You should have at least a few terms already from building your keyword list in step 2. You also know your business so sit down with your colleagues for 5 minutes and brainstorm some negative words too. Another tip is to run a search query report in AdWords if you are already running a PPC campaign and mine the negatives out of that. You can also go into your analytics package and look at what keywords people are finding your site for and take negatives out of that. For those queries in the search query report that Google does not want you to see, have a read of apollo SEM's guide to extract all the data. Once you think you have all the negative keywords you can think of, add them to your campaign immediately. In my opinion no campaign should ever start without negative keywords.

Create Your Root AdGroup & Ads :
What we need to do now is create a default, generic adgroup and ad. The ad should be action oriented and describe your product. Create your ad with strong words and use our guide to link them words with a strong call to action. This ad is only going to be our default ad for setup. We will not be using this ad in production. It should accurately reflect your product or service so you do not start off with a poor quality score. So assuming we are setting up the "Image Resize Software" campaign, we create an ad with "Image Resize Software" in the title and at least once in the ad copy. No need to tweak just yet, this is only for setup. We like to call this initial adgroup "Campaign Name Root". What we need to do now is dump all the keywords from our keyword list into this adgroup. There could be thousands, that does not matter. We will separate them all further on. The important thing is to setup this root campaign and have all the keywords possible thrown in. Once setup is complete, confirm all your actions and your campaign will go live. Pause this campaign immediately. We will be doing a lot more work on the campaign so we do not want it live.

Download Your New Campaign & Split It Up :
Now we really get to have some fun. If you have not done so already, download AdWords Editor and download your account containing your new campaign with the root adgroup. What we need to do now is use the "keyword grouper" tool within AdWords editor to group our keywords by theme (Check the screenshot to see how to access this tool). When given the option to "copy text ads from a template" select yes as we will use our default root text ad for now. Finish the process and you will have lots of ad groups divided into common "themes". Upload the new campaign with the newly separated adgroups to Google and log out of AdWords editor for now.

Manually Create New Ads For Each AdGroup :
The next step we need to take is to go back into AdWords and create new and custom ads for each adgroup. If you are stuck for time, create a minimum of two ads per group. If you want to start off strong, create at least four ads for testing. It is absolutely essential that we use the "theme" keyword in in our ads titles. AdWords editor makes this easy by naming the adgroup the same name as the "theme" word. The "theme" word should also be used in the ad copy if possible and absolutely in the display URL as either a "fake" sub directory or a "fake" subdomain. The reason for this is so that AdWords will assign a decent initial quality score to your keywords and so that anyone searching for your keyword will see the exact keywords they searched for bolded in your ad. You should set the destination URL to either the category/product page or if you have the time, an individual landing page for that product and keyword combined. Make sure that your ads are compelling, are grammatically correct and have a clear call to action. You may also want to take this opportunity to create some Dymanic Keyword Insertion powered ads

Expand Your Keywords :
At this point we like to go into each adgroup and use the AdWords keyword too to expand our keyword list. Copy all the keywords from your adgroup and paste them into the keyword tool making sure the "use synonyms" box is checked. The AdWords keyword tool will give you a list of possible other terms you might want to add to the adgroup that you may not have thought about (as well as give some additional keywords for your negative list). In some cases, you may also want to use the in built keyword pad tool to duplicate all your keywords using different match types. A lot of times different match types cost different prices and convert differently. Once you have a packed up your adgroups with relevant keywords, you are almost good to go.

Duplicate,Track,Monitor,Succeed :
Once you have all your search campaigns ready to go, your final step is to make sure that your analytics package is installed correctly and that your ads are showing up in the countries you are targeting. Insure that your conversion tracking is working correctly and place a test order if necessary. Once you are sure you are setup correctly, you can now duplicate your campaigns for content network use (Simply copy and paste in AdWords Editor) and for use on other PPC networks. Please note that your campaigns will almost always perform differently on the content network and on your other PPC accounts. You should modify your bids and check your status on these accounts individually.

No comments:
Post a Comment